Sunday, April 20, 2008

HS-406 fix

Made two HS-406 tips that will be riveted on to the original HS-406. The HS-406 is too small, about 1/2 inch (see earlier posts), so the flanges on the tip will be cut back, and the new tips will be rivited in place about 1/2 inch more fwd. It has (according to Van's) no structural consequence to leave the forward part of the rib unriveted, but it will not look good. Do to the fixtures in the jig, I have to take the skeleton out to have room for the tools to fasten the rib fixes.

Trimmed the skins according to plans.

Sunday, April 13, 2008

Both HS skins drilled

Both skins are drilled, and look good. Since I already had holes drilled in the skeleton, the method used was:
  • Fit and clamp the skins (adjust to get 11" at tip and correct overhang)
  • Use the (homemade) holefinder at the TE.
  • Unclamp at one side, bend the skin up if needed and use the 6" drill for the middle rib.
  • Take the other side of the rib, by clamping/unclamping the other side.
  • Holefinder at root/tip up to the senter spar.
  • Unclamp/6" drill for the spar.
  • Holefinder for the rest, except 407 which was new and drilled the ordinary way.

Not at all difficult, but time consuming and I needed a second pair of hands to hold back the skin and insert clecos when drilling with the 6" drill from the inside.

Friday, April 11, 2008

One HS skin ready

Finished drilling one of the skins. Started fitting the other.

Thursday, April 10, 2008

HS Skin, hole duplicators

After lots of fiddling I started drilling on one of the new HS skin. I use hole duplicators for the edges and a long 6" drill for the internals. It is a timeconsuming process, first some edges with hole duplicators, then some internals by bending up the skin on one side and so on, and the skin must be clamped real good. I hope it turns out OK.

The 6" hole duplicator from Avery (or was it Aircraft Tools Supply) is too long for most of the holes. I therefore made a small one myself from a stainless steel ruler, one m6 bolt and a 3/32 rivet that is epoxied on. It works perfectly.


Tuesday, April 1, 2008

Stiffeners on rudder, new HS skins

Today the new skins for the HS came, only 6 days after telling Van's about the errors. The new ones are better, and will fit, but they are not perfect. It is impossible to make the HS according to the drawings with them, there will be at least 2-4/16 of an inch wrong. In my opinion Van's should do one of two things:
  1. Make them right.
  2. Make them oversize so the trailing edge has to be trimmed.

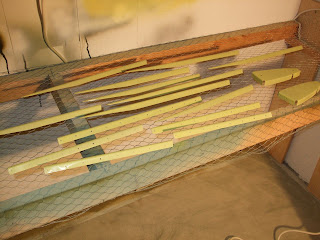
Back riveted the rudder stiffeners to the rudder skin. (It is strange how my camera insist on making the Strontium Chromate green, when it is yellow)


Monday, March 31, 2008

Main spar VS and rudder

Dimpled and countersunk the main spar assembly for the VS. Primed and riveted together. Had to use the rivet gun for the rivets closest to the hinges. Dimpled and primed the rudder skin and stiffeners, ready for riveting.

The new skins for the HS were not correct. Van's had bent them offset and to an angle to the correct bend line. They are sending new skins, but it makes me wonder if they have any quality control at all "over there".

Wednesday, March 19, 2008

P05 Primer, new parts and HS-406 problem

The new parts have arrived, and they all look to be in perfect condition. Removed the HS-407 and fitted the new HS-407 that came with the damaged parts.

The HS-406 spar problem is apperently known by Van's. The problem is that the forward part of the HS-406 is too narrow, so it will not fit the skin and the two forward most rivets on each side should be disregarded. According to Van's the strength at that area is in the curvature of the skin, not the spar. If the skin is to be fitted "flush" over the ribs, the cord of the tip on the HS will be too small (I did this). If the tip is to be the correct dimension, the HS-406 will not fit, and this is the correct way to do it (who said building a RV-4 was easy? :-) ). I don't think having the first 2-3 inches of the HS-406 unriveted and loose will look good, so I will cut the spar and insert an extension so the spar fits all the way.

Tried the P05 Strontium Chromate epoxy primer for the first time today on the rudder strengteners and the new HS-407. Compared with the WG6650 etch primer, the P05 applies thinner and is easier to spray. It is also less messy because I only need a very thin layer, and the odour is not nearly as strong and "etchy" as the etch primer (I use proper mask, gogles and suit). I guess the etch primer makes much more fumes than the epoxy primer, but the Strontium Chromate is not exactly healthy either. I found out the messy way that the epoxy hardener eats up my plastic cups I use to mix the primer in, so I have to get some other cups with different kind of plastic. The colour of the P05 is "Strontium Chromate Yellow", sort of very bright yellow lime green (more yellow than what it appears like on the photo where the old WG6650 primed rib is compared with the P05 primed rib. The WG6650 looks more green than what it appears like on the photo).

I also tried the Derinoxalu. It is an acid cleaner of some sort and is to be used before the P05. It probably burns away all traces of fat and silicone (and everything else judging by the smell), but I didn't see much etching on the alu.