
Showing posts with label horizontal surface. Show all posts
Showing posts with label horizontal surface. Show all posts
Friday, May 23, 2008

Wednesday, May 21, 2008
More riveting on the HS
Got my pneumatic rivet squizer from Averytools along with rivets and a rivet cutter from Aircraft Tools Supply. Used the rivet squizer on the trailing edge. From all the tools I have purchased, the pneumatic rivet squizer must be the top.
The riveting is going very well. On the next parts I have to remember not to drill holes too close to the ribs.

The riveting is going very well. On the next parts I have to remember not to drill holes too close to the ribs.

Friday, May 2, 2008
Started riveting the skins
After a few tries with wrong bars, the first line of rivets on the HS is formed. According to Tom at Van's it is best to try to rivet as much as possible in the jig to be sure that the HS is straight.


Dimpling the HS
Dimpled all the holes in the HS. Riveted on the extensions to the HS-406. Primed the skeleton "a bit" with epoxy on top of the wash primer.
Tuesday, April 29, 2008

Sunday, April 27, 2008
Trimmed and deburred the HS skins
Trimmed the LE and tip of the hs skins. Deburred all holes. The HS is finally ready for priming and riveting.
Tuesday, April 22, 2008
Fixing the HS-406
Adjusted the fabricated tips slightly and drilled them on. This clearly shows the original HS-406 being about 1/2 inch too short. The only thing missing now is that the dimension on the drawing is wrong and should be 10 1/2 inch instead of 11....
These tips probably will not do much structurally, but they certainly holds the tip of the HS better in place. When primed and riveted on, the whole thing looks better as well.


These tips probably will not do much structurally, but they certainly holds the tip of the HS better in place. When primed and riveted on, the whole thing looks better as well.


Sunday, April 20, 2008
HS-406 fix
Made two HS-406 tips that will be riveted on to the original HS-406. The HS-406 is too small, about 1/2 inch (see earlier posts), so the flanges on the tip will be cut back, and the new tips will be rivited in place about 1/2 inch more fwd. It has (according to Van's) no structural consequence to leave the forward part of the rib unriveted, but it will not look good. Do to the fixtures in the jig, I have to take the skeleton out to have room for the tools to fasten the rib fixes.
Trimmed the skins according to plans.

Trimmed the skins according to plans.

Friday, April 11, 2008

Thursday, April 10, 2008
HS Skin, hole duplicators
After lots of fiddling I started drilling on one of the new HS skin. I use hole duplicators for the edges and a long 6" drill for the internals. It is a timeconsuming process, first some edges with hole duplicators, then some internals by bending up the skin on one side and so on, and the skin must be clamped real good. I hope it turns out OK.
The 6" hole duplicator from Avery (or was it Aircraft Tools Supply) is too long for most of the holes. I therefore made a small one myself from a stainless steel ruler, one m6 bolt and a 3/32 rivet that is epoxied on. It works perfectly.


The 6" hole duplicator from Avery (or was it Aircraft Tools Supply) is too long for most of the holes. I therefore made a small one myself from a stainless steel ruler, one m6 bolt and a 3/32 rivet that is epoxied on. It works perfectly.


Tuesday, April 1, 2008
Stiffeners on rudder, new HS skins
Today the new skins for the HS came, only 6 days after telling Van's about the errors. The new ones are better, and will fit, but they are not perfect. It is impossible to make the HS according to the drawings with them, there will be at least 2-4/16 of an inch wrong. In my opinion Van's should do one of two things:


- Make them right.
- Make them oversize so the trailing edge has to be trimmed.
Back riveted the rudder stiffeners to the rudder skin. (It is strange how my camera insist on making the Strontium Chromate green, when it is yellow)


Wednesday, March 19, 2008
P05 Primer, new parts and HS-406 problem
The new parts have arrived, and they all look to be in perfect condition. Removed the HS-407 and fitted the new HS-407 that came with the damaged parts.
The HS-406 spar problem is apperently known by Van's. The problem is that the forward part of the HS-406 is too narrow, so it will not fit the skin and the two forward most rivets on each side should be disregarded. According to Van's the strength at that area is in the curvature of the skin, not the spar. If the skin is to be fitted "flush" over the ribs, the cord of the tip on the HS will be too small (I did this). If the tip is to be the correct dimension, the HS-406 will not fit, and this is the correct way to do it (who said building a RV-4 was easy? :-) ). I don't think having the first 2-3 inches of the HS-406 unriveted and loose will look good, so I will cut the spar and insert an extension so the spar fits all the way.
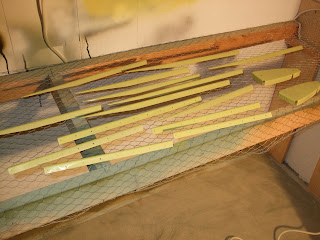
Tried the P05 Strontium Chromate epoxy primer for the first time today on the rudder strengteners and the new HS-407. Compared with the WG6650 etch primer, the P05 applies thinner and is easier to spray. It is also less messy because I only need a very thin layer, and the odour is not nearly as strong and "etchy" as the etch primer (I use proper mask, gogles and suit). I guess the etch primer makes much more fumes than the epoxy primer, but the Strontium Chromate is not exactly healthy either. I found out the messy way that the epoxy hardener eats up my plastic cups I use to mix the primer in, so I have to get some other cups with different kind of plastic. The colour of the P05 is "Strontium Chromate Yellow", sort of very bright yellow lime green (more yellow than what it appears like on the photo where the old WG6650 primed rib is compared with the P05 primed rib. The WG6650 looks more green than what it appears like on the photo).
I also tried the Derinoxalu. It is an acid cleaner of some sort and is to be used before the P05. It probably burns away all traces of fat and silicone (and everything else judging by the smell), but I didn't see much etching on the alu.

The HS-406 spar problem is apperently known by Van's. The problem is that the forward part of the HS-406 is too narrow, so it will not fit the skin and the two forward most rivets on each side should be disregarded. According to Van's the strength at that area is in the curvature of the skin, not the spar. If the skin is to be fitted "flush" over the ribs, the cord of the tip on the HS will be too small (I did this). If the tip is to be the correct dimension, the HS-406 will not fit, and this is the correct way to do it (who said building a RV-4 was easy? :-) ). I don't think having the first 2-3 inches of the HS-406 unriveted and loose will look good, so I will cut the spar and insert an extension so the spar fits all the way.
Tried the P05 Strontium Chromate epoxy primer for the first time today on the rudder strengteners and the new HS-407. Compared with the WG6650 etch primer, the P05 applies thinner and is easier to spray. It is also less messy because I only need a very thin layer, and the odour is not nearly as strong and "etchy" as the etch primer (I use proper mask, gogles and suit). I guess the etch primer makes much more fumes than the epoxy primer, but the Strontium Chromate is not exactly healthy either. I found out the messy way that the epoxy hardener eats up my plastic cups I use to mix the primer in, so I have to get some other cups with different kind of plastic. The colour of the P05 is "Strontium Chromate Yellow", sort of very bright yellow lime green (more yellow than what it appears like on the photo where the old WG6650 primed rib is compared with the P05 primed rib. The WG6650 looks more green than what it appears like on the photo).
I also tried the Derinoxalu. It is an acid cleaner of some sort and is to be used before the P05. It probably burns away all traces of fat and silicone (and everything else judging by the smell), but I didn't see much etching on the alu.


Wednesday, February 13, 2008
Started with rudder
Sometimes I take one step fwd and two steps back. This time I did it twice... While waiting for new parts on the HS and VS, I continued with the rudder.
I made all the V-blocks for the rudder and elevator jigs, made the brake for the trailing edge bends and a countersink metal plate for the back riveting. Then I made all the stiffeners for the rudder and they are ready for being drilled to the skins.
Ordered a torque wrench, strap duplicators to drill the new skins and a few other things from Averytools, and reamers and drills from Aircraft Tool Supply.

It turns out that the HS-406 rib on the HS is a bit strange. The fwd part of the flange does not fit the skin, making it impossible to achieve the correct dimension at the tip of the HS (11 inch cord) while the skin at the same time fits properly on the HS-406. When my skins fitted properly, I measured a cord of 10.5 inches. I thought that it was obvious that the skin should fit the ribs and that the tip cord would become whatever it became. This was wrong, because the tip has to fit with the elevator and the balancing arm. According to Van's I should simply disregard the poor fitting of the fwd part of the flange by not putting any rivets there, because the strength of the structure is in the curvature of the skin, not the rib. I think this will look strange having unriveted flanges, so I ordered two new HS-406 ribs that I will modify so they fit, either by making the tip longer by 0.5 inch, or by widening the tip angle. I also ordered new skins, all the rivet holes were finished before I found out about the 11 inch glitch.
On the VS-408 I managed to cut the forking 9.5 inches instead of 8.5 inches. A new one will come with the skins for the HS.
So, the drawings are correct, even though the parts doesn't allways fit accordingly. It is therefor much better to modify the parts instead of "modifying" the drawings. Also, from now on I will allways wear glasses while building...
I made all the V-blocks for the rudder and elevator jigs, made the brake for the trailing edge bends and a countersink metal plate for the back riveting. Then I made all the stiffeners for the rudder and they are ready for being drilled to the skins.
Ordered a torque wrench, strap duplicators to drill the new skins and a few other things from Averytools, and reamers and drills from Aircraft Tool Supply.

It turns out that the HS-406 rib on the HS is a bit strange. The fwd part of the flange does not fit the skin, making it impossible to achieve the correct dimension at the tip of the HS (11 inch cord) while the skin at the same time fits properly on the HS-406. When my skins fitted properly, I measured a cord of 10.5 inches. I thought that it was obvious that the skin should fit the ribs and that the tip cord would become whatever it became. This was wrong, because the tip has to fit with the elevator and the balancing arm. According to Van's I should simply disregard the poor fitting of the fwd part of the flange by not putting any rivets there, because the strength of the structure is in the curvature of the skin, not the rib. I think this will look strange having unriveted flanges, so I ordered two new HS-406 ribs that I will modify so they fit, either by making the tip longer by 0.5 inch, or by widening the tip angle. I also ordered new skins, all the rivet holes were finished before I found out about the 11 inch glitch.
On the VS-408 I managed to cut the forking 9.5 inches instead of 8.5 inches. A new one will come with the skins for the HS.
So, the drawings are correct, even though the parts doesn't allways fit accordingly. It is therefor much better to modify the parts instead of "modifying" the drawings. Also, from now on I will allways wear glasses while building...
Monday, January 21, 2008
Finished drilling HS skins, damage claim settled
All the holes in the HS skins are drilled. Only trimming, deburring, dimpling/countersinking, priming and riveting left :-)
Got a mail this evening that the damage claim is settled. The parts that where damaged during shipping, will be replaced with new parts from Van's.
Got a mail this evening that the damage claim is settled. The parts that where damaged during shipping, will be replaced with new parts from Van's.
Sunday, January 20, 2008
Skins HS drilling
Almost finished drilling both skins on HS. The second one was much faster than the first one. I imagined the skins would buckle and stretch and lots of difficulties, but they went on "just like that". I used these clamping clecos on both LE ends, then three large wooden clamps + some additional clamps.


Thursday, January 17, 2008
First holes in HS skin
Finally, after lots of measurements and gathering of enough guts, the first holes in the HS skin was drilled. The manual say I should start at the intersection HS-408/rear spar, but I contacted Van's and got the information that it is better to clamp as good as possible and start in the middle and spread out from there.
I will continue on the other side and drill/cleco alternately from each side. It probably doesn't matter, but somehow it feels that this will be better in terms of getting everything straight.

I will continue on the other side and drill/cleco alternately from each side. It probably doesn't matter, but somehow it feels that this will be better in terms of getting everything straight.

Saturday, January 5, 2008
HS measured and ready for skinning
Trimmed the skins so they fitted in the jig. Measured and clamped the skeleton into the jig. Made an additional fasteners so that the HS-405 ends will have correct distance from each other and from the CL. Temporary fastened the HS-407 with wood to prevent them from bending while fitting the skins. Marked centerlines and measured distances for rivet lines onto the jig.
Have to make some paper templates to prevent drilling into the fluting, otherwise everything is ready for skinning.
Now I thing I start to understand the reason for pre-punched skins.


Have to make some paper templates to prevent drilling into the fluting, otherwise everything is ready for skinning.
Now I thing I start to understand the reason for pre-punched skins.


Wednesday, December 19, 2007
Finished bucking the skeleton
Did the last few rivets on the skeleton of the HS. Had to drill out two rivets that were bad, but it is remarkable how fast one learn using the rivet gun. Also riveted on the 404 spars, and this results in using pop-rivets on the 407 spar/skin interface. Pop rivets doesn't look so nice as flush solid rivets, but it will be easier to get it properly done, nice and straight and good riveting. I think I will chose that path as a general rule in the future as well - higher probability of succeding with a good solution the first time before beauty, he he.
Found out that the HS-410 was a mm or so too large in the ends so it would interfere with the skin. Should have seen this long ago, but didn't, so had to file down the ends, polish and prime (with Zinc Chromate).


Found out that the HS-410 was a mm or so too large in the ends so it would interfere with the skin. Should have seen this long ago, but didn't, so had to file down the ends, polish and prime (with Zinc Chromate).


Tuesday, December 18, 2007
Bucking for the first time
Started to rivet together the skeleton and found out that some of the rivets must be bucked on because the rivet hand press just did not fit. Did some practicing on scrap metal.
Monday, December 17, 2007
Clamps for the HS
Made clamps to use when skinning the HS, 3 pieces. Hmm, looking at them, the largest looks a bit too large...


Subscribe to:
Posts (Atom)