Sunday, December 12, 2010
More trimming
Started trimming (cutting and filing) on the right elevator skin. Cut out both tip skins from the sheet of metal.
Tuesday, December 7, 2010
Drilled right elevator skin
Measured and drilled the skin to the skeleton. The tip rib remains, but 8 will install the elevator to the HS first to get it as straight as possible.


Sunday, December 5, 2010
Right elevator skin ready to be drilled
Measured and roughly trimmed the skin. It is now ready to be drilled to the skeleton.


Monday, November 29, 2010
Sunday, November 28, 2010
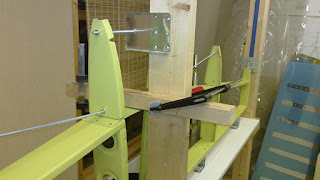
Right elevator skinning
Finished (pressed) the trailing edge and set up the jig for the right elevator. Cleaned up the shop a bit and put some boat parts and all the new rivets in right.places.


Tuesday, November 2, 2010
Rivets rivets rivets
Purchased several tons of rivets from a collegue at work who used to be an aircraft mechanic. All kinds of sizes including a big case of cherrymax rivets and a very professional looking original Cherrymax hydraulic puller with 3 different extensions. Some other hardware was includd as well.


Monday, May 24, 2010
Riveted the stiffeners to the skin
Dimpling and riveting of stiffeners to the left elevator skin. I am a bit confused regarding the sequence of the trim and the cutting of the skin and riveting of the skeleton. Have to study the drawings closely as the manual doesn't make 100% sense.


Sunday, May 23, 2010
Primed left elevator skin
Primed left elevator skin and trim. The boat is on the water with new antifoul, two new pumps and a fully working engine, so it is time to start building again.


Thursday, April 29, 2010
Riveted elevator ribs
Riveted the elevator spars. Reveived a 28 inch sheet of 032 alclad since I already have used some of the first one making it too short for the elevators. Together with the sheet I also received 400 CS4-4 rivets for my neighbour to use on his litle trailer for his motorcycle.
The new raw water cooling pump for my boat also finally showed up after being stranded by volcanic ash I guess. It looks very cool and "boatish" being made of solid brass.

The new raw water cooling pump for my boat also finally showed up after being stranded by volcanic ash I guess. It looks very cool and "boatish" being made of solid brass.

Sunday, April 25, 2010
Deburred and primed elevator ribs
Deburred and primed left elevator ribs and left elevator stiffeners. Also had to cut out from the aft spar to make space for the control horn. Definitely should have done that before everything was riveted together, but it worked out OK. Had to prime the HS after cutting, so I primed the whole aft end. Stupid thing with two component primer, there is a minimum amount when mixing, so there will allways be too much, and if it is too litle, I have to mix another batch, so it will be too much no matter what. Will do the same with the VS, it looks so much better when all the pen marking are (almost) gone.
Put some blue anti fouling on the boat as well on one side. Soon it will be on the water.


Put some blue anti fouling on the boat as well on one side. Soon it will be on the water.


Sunday, April 18, 2010
Elevator tips
finished measuring and drilling elevator tips. Included baffles for led on the right elevator as well. I originally planned to install led plates, but I think melting the led is easier because my plates are to thin by themselves, and to thick when mounted in double.
The skin and stiffeners are ready for deburring and priming as well, so lots of deburring and priming next.

The skin and stiffeners are ready for deburring and priming as well, so lots of deburring and priming next.

Saturday, April 17, 2010
Left elevator
Placed and drilled the brackets in place for the hinge rods on the left elevator. Fluted the tip ribs.


Wednesday, April 14, 2010

Tuesday, April 13, 2010
Tungsten bucking bars
Got my tungsten (Wolfram) bucking bar today directly from China. Less than half the price compared with the USA. These bucking bars are made of 95% W, 3% Fe and 2% Ni. They have a density of approximately 18 g/cc (steel/iron has about 7.8, lead about 13 g/cc).
I ordered them at chinatungsten.com in China.

I ordered them at chinatungsten.com in China.

Saturday, April 10, 2010
Raw seawater pump corroded
Have to fix the boat as well before the summer starts. The raw seawater pump had a strange sound to it last summer. Took it home today, opened it, and found two bearings totally corroded. The pump housing is made of brass, while the shaft and roller bearings are made of steel. It has been running for 30 something years, and the brass looks as good as new after a slight polish. The shaft is SS and also looks almost new, but the bearings are gone. There is also some gasket things on the shaft that are worn, and probably the main reason for the corrosion.
New pump is ordered.

New pump is ordered.

Monday, April 5, 2010
Thursday, April 1, 2010
HS finished
So, there it is, the new HS. Have to trim the tips to correct span and probably adjust the overhang slightly. The "thread check" on the hinge brackets now shows a straight line, so the elevator will work this time.
I actually have 6 (six!) ruined HS skins in storage now :-) The two first where wrong due to HS-406 ribs is not made by Van's according to the plans, I found that out the hard way, and Van's sent me new skins free of charge. The next two were bent wrong by Van's, I found that out the easy way by measuring them, and again Van's sent me new ones free of charge. But due to the jig bending, the hinge brackets were out of line. The last two I purchased along with new ribs and spars. They were bent correct within my measuring accuracy.
Someone at EAA said something like "It is never skill or workmanship that finishes an airplane, it is the will to do so". He was absolutely correct. I know that at this time both my skills and workmanship are more than good enough to finish this airplane, but all the problems with the HS has degraded my will to finish it for long periods of time. I have to remember this - always, and keep on building.


Wednesday, March 31, 2010

Tuesday, March 30, 2010


Monday, March 29, 2010
Deburring, deburring and dimpling
Deburred the skin and skeleton. Primed the skin and dimpled the skeleton.
Saturday, March 27, 2010

Monday, March 22, 2010

Sunday, March 21, 2010

Saturday, March 20, 2010

Tuesday, March 16, 2010
Adjusted the skeleton in the jig
Measured up the skeleton in the jig and fastened it with clamps and long bolts. The tip flanges will be riveted into the tip ribs when the skins are on.


Sunday, March 14, 2010

Saturday, March 13, 2010

Sunday, March 7, 2010
HS ribs ready for priming
Drilled the ribs into yheir positions. Ribs are ready for priming and deburring.


Tuesday, March 2, 2010


Monday, March 1, 2010
Fluted HS ribs
Measured rivet lines and rivet positions on the ribs. Fluted the ribs and made the extentions on the tip ribs so they fit with the skin.


Sunday, February 28, 2010
Tuesday, February 23, 2010

Monday, February 22, 2010
Primed the spars
Deburred and primed the spars. I have to ventilate the house due to the fumes, but when the outside temp is -20 C it gets rather cold :-)
I also replaced the LCD screen on Olaugs Asus EEE after it had rough landing on the floor. Makes me wonder, that LCD screen is tiny. Hooked up to a NI Compact RIO or some other compact embedded system. Or an industrial touch screen and embedded NI logging system.

I also replaced the LCD screen on Olaugs Asus EEE after it had rough landing on the floor. Makes me wonder, that LCD screen is tiny. Hooked up to a NI Compact RIO or some other compact embedded system. Or an industrial touch screen and embedded NI logging system.

Front and aft spar HS ready for deburring
Both spars are ready for deburring and priming. I had one pair of hinge brackets without rivet holes, and installed those because the original ones were a bit off.


Saturday, February 20, 2010
Aft spar HS
Drilled the aft spar. Due to using the old HS-409, the hinge brackets need to be positioned at the same time.


Friday, February 19, 2010


Thursday, February 18, 2010
New parts arrived
New parts arrived less than a week after ordering. I am reusing the HS-409 and possibly the 410 along with the main elevator bearing.
It is incredible how much damage the bucking bar has done to the parts primed with the wash primer. Large scars into the alclad. Probably a good (and only?) reason for using epoxy primer on the internals.


It is incredible how much damage the bucking bar has done to the parts primed with the wash primer. Large scars into the alclad. Probably a good (and only?) reason for using epoxy primer on the internals.


Wednesday, February 10, 2010
Friday, February 5, 2010

Wednesday, February 3, 2010
Sunday, January 31, 2010
Inspected holes in HS
Due to riveting the skin, taking it off, then on and off... some of the holes are now a bit too large, and a fair amount of oops rivets need to be inserted. I would prefer not to, but at this stage it is better to move on. When I'm finished with the plane, and I'm still not satisfied with the HS, I will have lots of time making a new one. Priority now is that the HS is straight and strong.
Monday, January 25, 2010
Sunday, January 24, 2010
Quick fix on HS - no luck
Riveted a few of the rivets on the aft spar. Then I took off the HS from the jig too see how things were going. As I suspected, what had happened was that even though the HS was straight in the jig, when it came off, it took the former shape. Each single cleco doesn't really force the HS into shape, but all of them together does. The rivets will also force it more into the former shape, because they naturally will center the holes when they are squized. So when in the jig, the HS was in a lot of tension that increased a tiny bit for every rivet that was squized. When taken out, the tension is released, and the HS gets to its former shape.
So much for easy fixing. There is only one way to fix this: New skins.
So much for easy fixing. There is only one way to fix this: New skins.
Saturday, January 23, 2010
Friday, January 22, 2010

Tuesday, January 19, 2010
HS and skins
After the jig was straightened, I tried to put the old skins on, to see if how far off they were. For some odd reason they fitted. Some rivets are a bit tight on the aft spar near the tip, but not by much. I guess the flexibility and the diameter of the holes compared to the rivets allows for large variations for pieces of the size of the HS, hence the importance of jigs (straight jigs that is).
Contacted Vans about this, and according to Ken Scott: "I would try riveting the stab back together, with it held in the jig. Variations this small can be taken out just by re-riveting". So the fix is hopefully much easier than first anticipated.
Contacted Vans about this, and according to Ken Scott: "I would try riveting the stab back together, with it held in the jig. Variations this small can be taken out just by re-riveting". So the fix is hopefully much easier than first anticipated.
Sunday, January 17, 2010
HS in the jig
Reconfigured the jig for the HS again. Added one adjustable support in the middle to keep it straight. Inserted a line through some additional holes in the temporary hinge brackets to see if the jig is straight through the process, and to be able to adjust if necessary.


Subscribe to:
Posts (Atom)